안드로이드[Android] 다이얼로그(Dialog) 안에 이미지(Image) 넣기

xml부분
<RelativeLayout xmlns:android="http://schemas.android.com/apk/res/android"
xmlns:tools="http://schemas.android.com/tools"
android:layout_width="match_parent"
android:layout_height="match_parent"
android:padding="10dip" >
<ImageView
android:id="@+id/image"
android:layout_width="100dip"
android:layout_height="wrap_content"
android:scaleType="fitCenter" />
<TextView
android:id="@+id/text"
android:layout_width="match_parent"
android:layout_height="match_parent"
android:layout_alignBottom="@id/image"
android:layout_toRightOf="@id/image"
android:layout_marginLeft="10dip"
android:textColor="#000" />
</RelativeLayout>
public class MainActivity extends Activity {
@Override
protected void onCreate(Bundle savedInstanceState) {
super.onCreate(savedInstanceState);
setContentView(R.layout.activity_main);
Dialog dialog = new Dialog(this);
dialog.setContentView(R.layout.custom_dialog);
dialog.setTitle("Custom Dialog");
TextView tv = (TextView) dialog.findViewById(R.id.text);
tv.setText("Hello. This is a Custom Dialog !");
ImageView iv = (ImageView) dialog.findViewById(R.id.image);
iv.setImageResource(R.drawable.suji);
dialog.show();
}
}

setContentView() 메소드로 xml을 연결해주고 findViewById로 대화상자 내부의 TextView를 찾아서 내용을 입력하고, ImageView를 찾아서 사진을 넣어주면 됩니다. 이외에도 원하는 레이아웃대로 xml을 작성해서 넣으면 됩니다.
CusomDialog 띄우는 방법!
안드로이드[Andorid] 다이얼로그(Dialog) 종류
Android에서 지원하는 Alert Dialog종류
Alert Dialog 생성 코드는 간단하다. (본문 코드 출처 : Android 2.1 update 1 SDK API source)
onCreateDialog() method를 생성하고 id값을 받아 case로 분류하고 실행코드를 추가하면 된다.
Dialog 호출 코드 역시 간단하다. showDialog(id) method를 이용해서 호출하면 된다.
Android 2.1 up1에서 지원하는 Alert Dialog type과 생성코드는 다음과 같다.
- OK Cancel dialog with a message
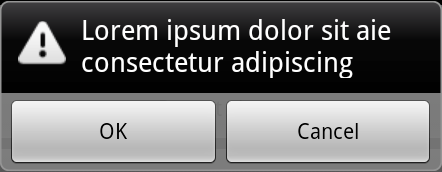
## 실행 코드 ##
## 호출 코드 ##
|
- OK Cancel dialog with a long message
 ## 실행 코드 ##
## 호출 코드 ##
|
- List dialog

## 실행 코드 ##
## 호출 코드 ##
|
- Progress dialog

## 실행 코드 ##
## 호출 코드 ##
|
- Single choice list
 ## 실행 코드 ##
## 호출 코드 ##
|
- Repeat alarm
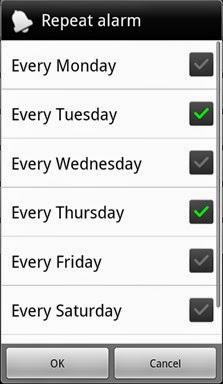 ## 실행 코드 ##
## 호출 코드 ##
|
- Text Entry dialog

## 실행 코드 ##
## 호출 코드 ##
|
다음에는 다이얼로그안에 이미지 넣는 방법을 설명하도록 하겠다.
안드로이드[Android] 다이얼로그(Dialog) 첫번째( 기본 다이얼로그)
1.다이얼로그 예제 코드 private AlertDialog createDialog() { AlertDialog.Builder ab = new AlertDialog.Builder(this); ab.setTitle("Title"); ab.setMessage("내용"); ab.setCancelable(false); ab.setIcon(getResources().getDrawable(R.drawable.ic_launcher)); ab.setPositiveButton("확인", new DialogInterface.OnClickListener() { @Override public void onClick(DialogInterface arg0, int arg1) { setDismiss(mDialog); } }); ab.setNegativeButton("취소", new DialogInterface.OnClickListener() { @Override public void onClick(DialogInterface arg0, int arg1) { setDismiss(mDialog); } }); }
이코드를 보면 추가하고싶은 클래스에 저 코드를 붙여서 쓰면 된다.!!
다음에는 다이얼로그 종류와 그안에 이미지 넣느법, 버튼 모양 다이얼로그 색상 바꾸는 방법등을 알아 보도록 하겠다.